You can fit a solar panel to a caravan or motorhome roof without drilling a hole for every fixing by bonding its mounting brackets with an elastic adhesive and sealing the cable entry. A careful layout helps you avoid roof fittings, keep the cable run practical and leave the roof watertight.
This guide covers the bonding and sealing work. For the electrical side (charge controller, battery, fuses and cable sizes), follow the panel and controller makers’ instructions or ask a qualified installer.
Why bonded mounts suit caravan and motorhome roofs
Bonded brackets avoid drilling through the roof skin at each fixing point, so you have fewer openings to seal and inspect. The adhesive bead spreads the load over the whole bracket footprint instead of concentrating it at screw points, and an elastic bond can absorb vibration while you travel.
A caravan roof can flex under load and change dimensions with temperature, so avoid rigidly fixing a panel across a flexible roof area. Sikaflex 252 600ml is an elastic, one-component polyurethane adhesive that Sika designed for bonding large components in vehicle assembly and for assemblies subject to dynamic stresses (Sika PDS v03.01, 04-2023).
What you need
- the solar panel and its mounting brackets or corner mounts;
- Sika Cleaner P to clean the bond faces;
- Sika Aktivator 205, an adhesion promoter, where the Sika data sheet calls for it;
- Sikaflex 252 600ml to bond the brackets;
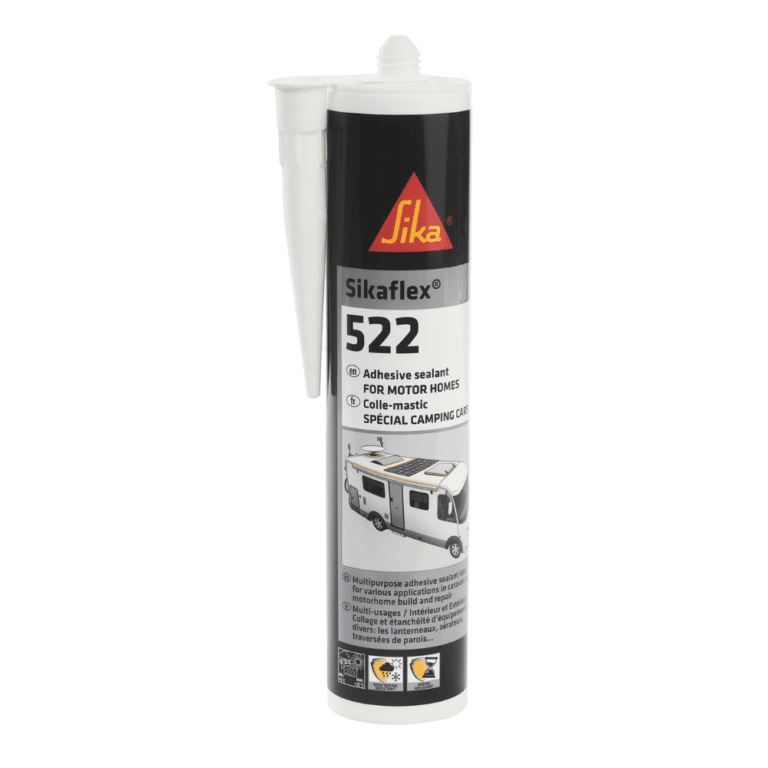
- Sikaflex 522 Caravan Sealant & Adhesive 300ml to seal the cable entry;
- a cable entry gland or entry plate sized for your cable;
- masking tape, a tape measure, a marker, clean lint-free cloths, a sealant gun that suits each pack and suitable gloves.
Keep both adhesives sealed and stored below 25 °C until you use them: Sika gives each a shelf life of 12 months under that condition (Sikaflex 522 in the cartridge). Sika describes these products as suitable for experienced professional users, so if you are unsure about any step, ask a caravan repairer.
Work on firm, level ground and use a secure access ladder. Avoid stepping on unsupported roof areas, and follow the caravan manufacturer’s instructions for safe access. Have someone help you position a large panel, and keep it secured against wind while you mark its location.
Checking the roof before you start
Find out what your roof is made of and check its condition. Wash away dirt, then inspect the proposed mounting area for cracks, loose fittings, damaged sealant, soft spots or signs of water ingress. Resolve any roof damage before fitting the panel.
Measure the flat, usable roof area and mark rooflights, vents, aerials, seams and other fittings. Leave space to reach these fittings, make sure the panel will not stop a rooflight from opening, and account for shadows from roof equipment, trees or nearby buildings, which can reduce panel output.
Check the caravan handbook or ask the manufacturer about roof load limits and whether bonded mounts suit your roof, and follow the panel maker’s mounting instructions. Mark each panel’s position with removable tape, then check the layout from inside and outside the caravan.
Plan the cable route at the same time. Choose a cable-entry point close to the solar charge controller, away from rooflights, vents and existing fittings, and check the corresponding interior area for cupboards, structural members and hidden wiring before making an opening.
Surface preparation
A sound bond depends on clean, dry and compatible surfaces. Prepare both bond faces: the roof area under each bracket and the underside of each bracket.
- Clean the bond faces with Sika Cleaner P, following its product instructions, and let them dry.
- Pre-treat with Sika Aktivator 205 where the Sika data sheet calls for it for your roof material and bracket.
- Keep the prepared areas free from fingerprints, dust and moisture until you apply the adhesive.
Always test the cleaner, pre-treatment and adhesive on the actual roof material first: Sika asks for tests on the actual substrates and conditions to confirm adhesion and compatibility. You can find both preparation products in the pre-treatments and primers range at Sealants4All.
Bonding the brackets with Sikaflex 252 600ml
Mask around each bracket footprint so you can remove excess adhesive cleanly. Apply Sikaflex 252 600ml to the bracket in the bead pattern the bracket or panel maker specifies, then press the bracket into place without squeezing out all the adhesive.
Work within the product’s stated limits. Sikaflex 252 has a skin time of 40 minutes and an open time of 35 minutes at 23 °C and 50 % relative humidity, and you should apply it at an ambient temperature of 10 °C to 35 °C (Sika PDS v03.01, 04-2023). Position each bracket within the open time, and do not reposition it once the adhesive has started to skin.
Hold each bracket in place so it cannot slide while the adhesive cures, for example with masking tape, and keep the panel and brackets undisturbed. Sikaflex 252 has a long-term service temperature of -40 °C to 90 °C.
Sealing the cable entry with Sikaflex 522
Use the correct gland or entry housing for the cable size, and follow the gland maker’s installation instructions. Route the cable through the gland, leaving enough slack to form a drip loop or other routing arrangement specified by the equipment manufacturer.
Sikaflex 522 Caravan Sealant & Adhesive 300ml is a silane terminated polymer (STP) sealant/adhesive with high weathering resistance, suitable for interior and exterior elastic sealing and bonding (Sika PDS v07.01, 10-2025). Prepare the roof surface around the opening in the same way as for the brackets, then seal the base of the gland or entry plate and the roof opening so water cannot get in, and seal around the cable where the gland maker directs.
Apply Sikaflex 522 at 5 °C to 40 °C. It has a skin time of 30 minutes at 23 °C and 50 % relative humidity, so tool the joint smooth before a skin forms. Its long-term service temperature is -50 °C to 90 °C.
Curing, aftercare and seasonal checks
Leave the panel and brackets undisturbed while the adhesive cures, and do not load the mounts or travel until the bond has cured according to the Sika data sheet. Curing speed depends on temperature and humidity, and the data sheet shows it as a diagram rather than a single figure; our guide on how long Sikaflex takes to dry explains the difference between skin time and full cure.
Check the bonded mounts and the cable gland after installation, then include them in your seasonal caravan checks. Look for lifting edges, cracks, gaps or movement around the brackets and the cable entry, and deal with any damage promptly to prevent water reaching the roof structure.
Clean the panel with clean water and a soft, non-abrasive cloth or sponge. Avoid scouring pads, abrasive cleaners and harsh solvents, which can scratch the panel surface or affect nearby roof materials, and do not direct high-pressure water at the seals or electrical connections.
If you find cracked seals, a loose bracket or movement, stop using the installation and ask a caravan repairer or the panel supplier to assess it before you travel again.
Related products and guides at Sealants4All
- Bonding and sealing products for caravans and motorhomes: caravan sealants.
- Choosing between the two adhesives used here: Sikaflex 252 vs 522.
- Sealing exposed exterior joints: Sikaflex 522 vs 521 UV.
- Tape or adhesive for other fittings: double-sided tape vs adhesive sealant.
Explore the caravan sealants and pre-treatments range at Sealants4All.