You replace a caravan rooflight by taking the inner frame off, lifting the old unit out of the roof aperture, cleaning the landing back to sound material, bedding the new flange in a continuous bead of Sikaflex 522 and fixing it from inside. Done in that order on a dry day, it is a hand-tool job that needs no new holes in the roof.
When a Caravan Rooflight Needs Replacing
Start with the dome. Cracks running from a corner, a milky crazed surface, a snapped hinge or a catch that no longer holds all mean a new unit rather than another bead of sealant, because the water is coming through the rooflight, not around it.
Then look inside. Water marks on the ceiling board next to the inner frame, a damp meter reading that climbs towards the aperture, or a frame that moves when you push it point to a failed seal under the flange. If the dome is sound you may only need to lift and re-bed the same unit, and the method below works for that too.
Outside, run a fingernail along the flange edge. Sealant that has lifted, gone chalky or split from the roof skin has stopped working. Do not seal over it: a new bead on failed material does not bond to the roof, and the water finds the same way in.
Measure Before You Order
Rooflights are sold by aperture size, so measure the hole in the roof, not the dome. Take the inner frame off, measure the opening in both directions and note the roof thickness from skin to ceiling board, because the inner frame has to span that depth. Compare the figures with the new unit’s specification before it arrives.
What to Have Ready
- The new rooflight with its inner frame, screws and any bedding strip or gasket the maker supplies
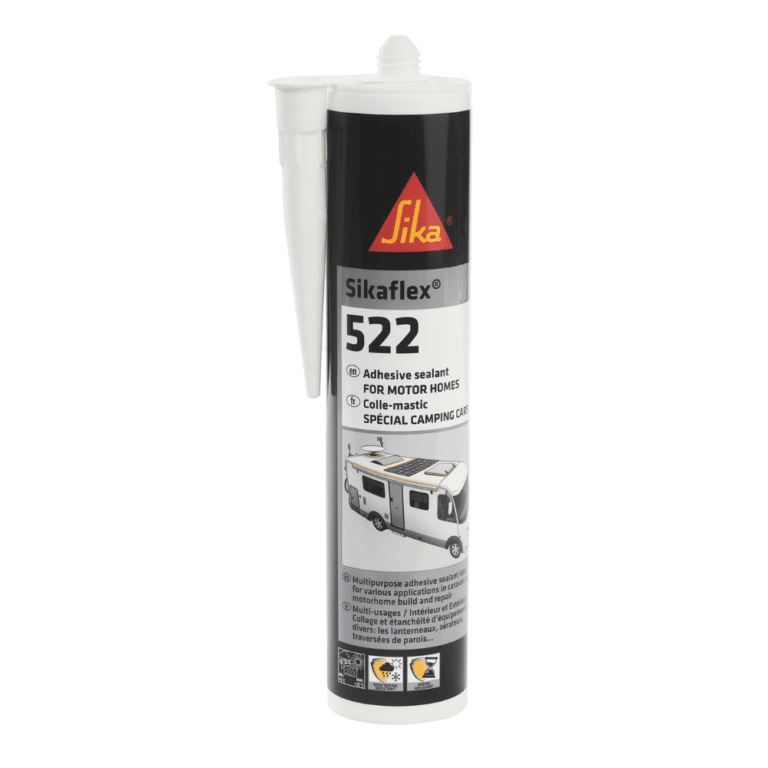
- Sikaflex 522 Caravan Sealant & Adhesive 300ml, a sealant and adhesive made for caravan and motorhome joints, in white or black to suit the roof
- A caulking gun and finishing tools. The Sikaflex 522 Caravan Kit puts the cartridge, gun and a 10-piece tool set in one box
- Sika Remover 208, lint-free cloths and a plastic scraper for the clean-up
- Stainless steel screws of the same size if the old ones are corroded, masking tape, a stable platform and a second pair of hands for the lift
Sika gives Sikaflex 522 an application temperature of 5 °C to 40 °C (Sikaflex-522 PDS v07.01). Pick a dry day inside that range with no rain forecast for the rest of the day, and keep the cartridge indoors the night before so it guns smoothly.
Taking Out the Old Rooflight
Work from inside first. Unscrew the inner frame or trim ring and keep the screws in order, because the fixing pattern shows you how the new frame goes back. With the frame off you can see the underside of the roof skin and any flange screws; remove those too.
Outside, the flange sits in a bead of old sealant that has to be cut, not pulled. Slide a plastic blade or one of the stripping profiles from the S4ALL PRO Silicone Removal and Finishing Tool 10 Piece Set under the flange edge and work round the perimeter in short strokes. A metal blade gouges aluminium and GRP roof skins and leaves a path for water, so keep steel tools out of this stage.
Lift the unit a little at a time, moving round the frame rather than levering one corner. A bent flange does not sit flat again, and if you are re-bedding the same rooflight you need it flat.
Cleaning the Landing
Scrape the cured sealant off the roof mechanically. Sika Remover 208 is for uncured Sikaflex, so it does not dissolve an old bead; its job here is to pre-clean the painted or metal landing before you bond to it, and to wipe up fresh sealant later. Pour it onto a clean cloth rather than dipping the cloth into the can, wipe the landing, then wipe off with a dry lint-free cloth before the solvent evaporates.
Test the remover on a hidden spot first. Painted panels, plastic trim and decorative films can soften, dull or change gloss, and the product page tells you to stop if the finish changes.
With the landing bare, press the roof skin around the aperture with the flat of your hand and look for soft spots or staining on the exposed edge of the roof sandwich. The roof-check routine in how to fit a solar panel to a caravan roof applies here as well: resolve roof damage before you fit anything over it.
Bedding the New Rooflight in Sikaflex 522
Dry-fit the new unit before you open the cartridge. Check it sits flat on the landing all the way round and that the inner frame lines up with the screw holes and spans the roof depth. Mark the flange outline on the roof with masking tape, then lift the unit out again.
Sikaflex 522 adheres well to a wide variety of substrates, and its product page names timber, glass, metals, metal primers and paint coatings, ceramic materials and plastics among them. The same page asks you to perform tests on original substrates before using it on materials prone to stress cracking, which can include rooflight plastics. Put a small dab on an unseen edge of the new flange and check that the plastic shows no cracking or clouding before you commit. Sika describes the product as suitable for experienced professional users; if a step is beyond you, use a caravan repairer.
The landing must be clean, dry and free from grease, oil and dust when the bead goes on. If the rooflight maker supplies a bedding strip or gasket, follow their instructions on whether sealant is used with it.
Applying the Bead and Fixing the Frame
- Cut the nozzle so the bead is a little wider than the flange’s contact face, and gun one continuous bead onto the underside of the flange, running it on the inside of each fixing hole so water cannot track along a screw.
- Lower the unit straight down inside your tape marks and press it home evenly, without sliding it, which drags the bead thin.
- From inside, fit the inner frame and start every screw by hand. Tighten them in a diagonal sequence, a little each, so the flange pulls down evenly and a small bead of sealant appears all round the outside edge.
- Stop when the flange is seated and the squeeze-out is even: over-tightening distorts the flange and pushes the bead out of the joint.
- Outside, draw a finishing tool from the set along the squeeze-out in one continuous movement to shape a neat fillet against the roof, then pull the masking tape while the sealant is still soft.
Wipe smears off the roof and dome with a cloth moistened with Sika Remover 208 before the sealant skins. Sika puts the skin time of Sikaflex 522 at 30 minutes at 23 °C and 50 % relative humidity (Sikaflex-522 PDS v07.01), so tool and clean up within that window. Clean the finishing tools before the sealant cures on them.
A rooflight flange is a sealing joint held by its screws, which is the job Sikaflex 522 is described for; if you were thinking of a structural adhesive instead, read Sikaflex 252 vs 522: bonding or sealing on a caravan first.
Curing, Leak Check and Yearly Checks
Keep rain and washing off the joint until the skin has formed. After the skin time the surface is touch-dry, but the sealant under it is still soft and goes on curing from the surface inwards. The Sika data sheet gives the full cure as a diagram rather than a single number, so do not rely on a rule of thumb from a forum; the guide to how long Sikaflex takes to dry explains what the data sheet does and does not state. Leave the dome closed and the caravan parked level while the bead cures, and do not tow until it has.
Once cured, test the work. Pour or hose water gently over the rooflight from above, not at the flange edge under pressure, and check the inner frame and ceiling board from inside with a torch and a dry tissue. Repeat after the first heavy rain.
Sikaflex 522 has a long-term service temperature of -50 °C to 90 °C (Sikaflex-522 PDS v07.01), and its product page describes it as high ageing and weathering resistant with high colour stability under UV. Each spring, open and close the dome, check the catches and hinges, and run a fingertip along the fillet for lifting edges.
A Cracked Dome and No New Unit Yet
If the dome has cracked and the replacement is on order, keep the water out meanwhile with Sika MultiSeal, a self-adhesive bituminous sealing tape with an aluminium film that Sika names for repairing, protecting and sealing roofs, roof lights, and caravans and trailers. Clean and dry the dome, cut the tape to length, remove the liner and press it firmly over the crack, paying attention to the edges. It is a cover until the new rooflight is fitted, not the repair.
Checklist Before You Pack Up
- Aperture measured and the new unit checked against it before fitting
- Old sealant cut and scraped off, landing cleaned with Sika Remover 208 after a test on a hidden spot
- Sikaflex 522 applied as one continuous bead, inside the fixing holes, at 5 °C to 40 °C
- Inner frame screws tightened evenly, squeeze-out tooled, smears wiped within the skin time
- Joint kept dry until skinned, hose test done after cure, damp reading noted
- Other roof fittings inspected while you were up there; see the caravan sealants category for anything else you need